Restoring the Beauty A Comprehensive Guide to Cultured Stone Repair
mosaic tile for sale , also known as manufactured or artificial stone, is a popular choice for home exteriors, fireplaces, accent walls, and other architectural features. Made from a mixture of cement, aggregates, and pigments, cultured stone mimics the appearance of natural stone at a fraction of the cost. However, like any building material, cultured stone can be subject to wear and damage over time. Whether due to weathering, improper installation, or accidental impact, repairing cultured stone requires knowledge, skill, and the right tools. In this comprehensive guide, we will explore the various aspects of cultured stone repair, from identifying common issues to implementing effective repair techniques.
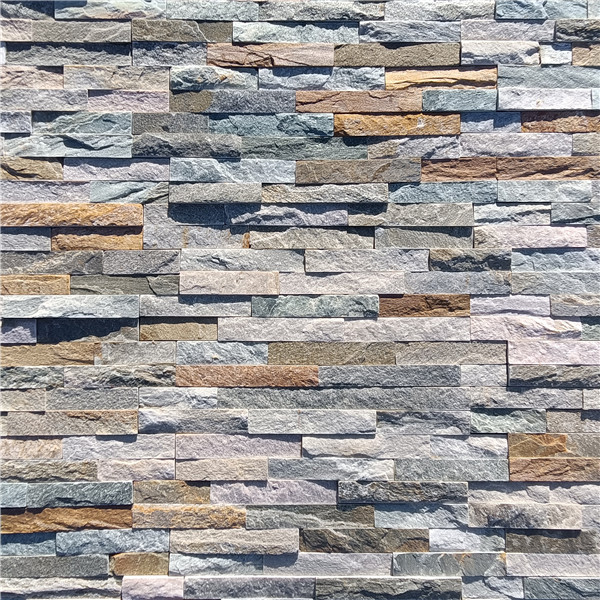
Understanding Cultured Stone
Before delving into the specifics of repairing cultured stone, it is essential to have a basic understanding of this material. Cultured stone is manufactured by pouring a mixture of cement, aggregates (such as sand or crushed stone), and pigments into molds that are designed to replicate the look and texture of natural stone. Once the mixture has cured, the resulting product is lightweight, durable, and versatile, making it a popular choice for both interior and exterior applications.
Common Issues with Cultured Stone
Despite its durability, cultured stone is not immune to damage. Over time, various factors can contribute to the deterioration of cultured stone, leading to aesthetic and structural issues. Some common problems associated with cultured stone include:
1. Fading: Exposure to sunlight, harsh weather conditions, and airborne pollutants can cause the pigments in cultured stone to fade over time, resulting in a dull or uneven appearance.
2. Chipping and Cracking: Impact from falling objects, heavy hail, or other external forces can cause cultured stone to chip or crack, compromising its integrity and aesthetics.
3. Staining: Mold, mildew, algae, and other organic growths can cause unsightly stains on cultured stone surfaces, detracting from their beauty.
4. Efflorescence: Efflorescence is a common issue in masonry products, including cultured stone, where white, powdery deposits form on the surface due to the migration of salts within the material.
5. Loose or Dislodged Stones: Improper installation, seismic activity, or other external factors can cause cultured stones to become loose or dislodged from their original position, creating gaps and potential structural issues.
Identifying the Repair Needs
Before proceeding with any repair work on cultured stone, it is crucial to assess the extent of the damage and identify the specific repair needs. Here are some steps to help you effectively evaluate the condition of your cultured stone surfaces:
1. Visual Inspection: Start by visually inspecting the entire cultured stone surface, looking for any signs of fading, chipping, cracking, staining, efflorescence, or loose stones. Take note of the location and severity of each issue.
2. Tap Test: Gently tap on the surface of the cultured stone with a small hammer or mallet. A hollow sound may indicate a loose or dislodged stone that needs to be secured.
3. Moisture Test: Use a moisture meter to check for any moisture intrusion behind the cultured stone surface, which can lead to efflorescence, mold growth, and other issues.
4. Documentation: Take photographs of the damaged areas from different angles to document the condition before starting any repair work. This will help you track your progress and ensure a consistent repair outcome.
Repair Techniques for Cultured Stone
Once you have identified the repair needs and assessed the condition of your cultured stone, it is time to implement the appropriate repair techniques. The following methods can be used to address common issues with cultured stone and restore its beauty and functionality:
1. Cleaning and Stain Removal
Before addressing any structural issues, it is essential to clean the cultured stone surface thoroughly to remove dirt, grime, mold, mildew, algae, and other stains. Depending on the type and severity of the stains, you can use a combination of the following cleaning methods:
- Pressure Washing: A pressure washer with a mild detergent can help remove surface dirt and grime from cultured stone. Be sure to use the appropriate pressure setting to avoid damaging the stone surface.
- Chemical Cleaners: For stubborn stains like mold, mildew, or algae, you can use specialized stone cleaners or diluted bleach solutions. Follow the manufacturer's instructions and test the cleaner on a small, inconspicuous area first.
- Scrubbing: Use a stiff-bristled brush or scrubbing pad to agitate the cleaner and lift off stubborn stains from the cultured stone surface. Rinse thoroughly with clean water to remove any residue.
2. Filling and Patching
For minor chips, cracks, or voids in the cultured stone, filling and patching are effective repair techniques that can restore the surface to its original smoothness and texture. Here's how to fill and patch cultured stone effectively:
- Clean the damaged area with a brush and compressed air to remove any loose debris or particles.
- Prepare a suitable patching compound, such as a cement-based mortar or epoxy resin, according to the manufacturer's instructions.
- Apply the patching compound to the damaged area using a trowel or putty knife, ensuring a smooth and even finish.
- Allow the patching compound to cure completely before sanding, shaping, or painting the repaired area to match the surrounding cultured stone.
3. Sealing and Waterproofing
To protect cultured stone surfaces from moisture intrusion, staining, and efflorescence, sealing and waterproofing are essential maintenance tasks that can extend the lifespan of the material. Follow these steps to seal and waterproof your cultured stone effectively:
- Choose a high-quality stone sealer or waterproofing agent that is specifically designed for cultured stone surfaces.
- Apply the sealer or waterproofing agent using a brush, roller, or sprayer, following the manufacturer's instructions for coverage and drying time.
- Allow the sealer to cure completely before subjecting the cultured stone surface to water exposure or heavy traffic.
- Reapply the sealer periodically, according to the manufacturer's recommendations, to maintain the protective barrier and ensure long-lasting performance.
4. Reattaching Loose Stones
If you have identified loose or dislodged stones on your cultured stone surface, it is crucial to reattach them promptly to prevent further damage and potential safety hazards. Here's how you can reattach loose stones effectively:
- Clean the back of the loose stone and the surrounding area on the cultured stone surface to remove dirt, dust, and debris.
- Apply a suitable construction adhesive or mortar to the back of the loose stone, ensuring full coverage and a secure bond.
- Press the loose stone firmly into place on the cultured stone surface, holding it in position for a few minutes to allow the adhesive or mortar to set.
- Use masking tape or temporary supports to hold the stone in place while the adhesive or mortar cures completely.
5. Matching Texture and Color
After completing the necessary repairs on your cultured stone surface, it is essential to match the texture and color of the repaired areas to the surrounding stone for a seamless finish. Here are some tips to help you achieve a consistent look:
- Use pigmented mortar or patching compound that closely matches the color of the existing cultured stone to fill in any gaps or voids.
- Mimic the texture of the surrounding stone by stippling, carving, or shaping the patching compound with a trowel, brush, or other tools.
- Blend the repaired areas into the surrounding stone by feathering the edges and creating a gradual transition between old and new surfaces.
- Allow the repaired areas to cure completely before applying any finishing touches, such as painting or sealing, to achieve a uniform appearance.
Conclusion
Cultured stone repair requires careful assessment, planning, and execution to ensure a successful outcome that restores the beauty and functionality of your architectural features. By understanding the common issues associated with cultured stone, identifying the repair needs, and implementing effective repair techniques, you can prolong the lifespan of your cultured stone surfaces and enhance the overall aesthetics of your home. Whether you are addressing minor chips and cracks, stubborn stains, or loose stones, following the steps outlined in this guide will help you navigate the process of cultured stone repair with confidence and achieve professional results that stand the test of time.

Public Last updated: 2025-06-18 03:08:15 AM