DIY Cultured Stone A Comprehensive Guide to Creating Your Own Custom Stone Veneer
Introduction
Cultured stone, also known as manufactured stone or stone veneer, is a popular alternative to natural stone for various construction and design projects. It offers the look and feel of real stone at a more affordable price point and with added flexibility in terms of customization. While cultured stone is readily available for purchase, many homeowners and DIY enthusiasts are opting to create their own custom cultured stone to suit their specific needs and preferences.
In this comprehensive guide, we will explore the process of DIY cultured stone production, including the materials and tools needed, step-by-step instructions, tips for achieving professional results, and creative ideas for using custom cultured stone in home improvement projects.
Materials and Tools
Before diving into the process of creating your own cultured stone, it is important to gather all the necessary materials and tools. Here is a list of items you will need to get started:
Materials:
1. Portland cement
2. Sand
3. Water
4. Concrete coloring pigment
5. Mold release agent
6. Fiberglass mesh
7. Concrete sealer
Tools:
1. Mixing container
2. Trowel
3. Rubber gloves
4. Safety glasses
5. Dust mask
6. Paintbrush
7. Mold for shaping the stone
It is essential to choose high-quality materials to ensure the durability and aesthetic appeal of your custom cultured stone. Additionally, consider the color palette and texture you want to achieve, as these choices will influence the selection of concrete coloring pigments and mold designs.
Step-by-Step Instructions
Now that you have gathered all the necessary materials and tools, let's walk through the step-by-step process of creating your own custom cultured stone:
Step 1: Prepare the Mold
Choose a mold design that suits the style and size of the cultured stone you want to create. Apply a mold release agent to the interior of the mold to prevent the concrete mixture from sticking.
Step 2: Mix the Concrete
In a mixing container, combine Portland cement, sand, water, and concrete coloring pigment according to the manufacturer's instructions. Mix the ingredients thoroughly until you achieve a smooth and workable consistency.
Step 3: Add Fiberglass Mesh
Cut a piece of fiberglass mesh to fit the mold and place it at the bottom of the mold. This will help reinforce the cultured stone and prevent cracking.
Natural ledge stone for landscaping : Fill the Mold
Using a trowel, carefully fill the mold with the concrete mixture, making sure to press it into all the corners and edges. Smooth the surface with the trowel to create a uniform appearance.
Step 5: Shape the Stone
Use a paintbrush or other tool to add texture and definition to the surface of the cultured stone before the concrete sets. You can create natural-looking imperfections and details to mimic the appearance of real stone.
Step 6: Cure the Stone
Allow the cultured stone to cure in the mold for the recommended time specified by the concrete manufacturer. This typically ranges from 24 to 48 hours, depending on the specific product used.
Step 7: Demold the Stone
Carefully remove the cultured stone from the mold once it has fully cured. Gently tap the mold to release the stone, being careful not to damage the edges or details.
Step 8: Seal the Stone
Apply a concrete sealer to the surface of the cultured stone to protect it from moisture, stains, and UV damage. Follow the manufacturer's instructions for proper application and drying times.
Tips for Achieving Professional Results
Creating custom cultured stone requires attention to detail and a steady hand to achieve professional-looking results. Here are some tips to help you enhance the quality and appearance of your DIY cultured stone:
1. Experiment with Different Mold Designs: Explore various mold shapes and sizes to create a diverse collection of cultured stones for your projects. Mix and match different designs to add visual interest and depth to your installations.
2. Practice Texture Techniques: Use tools like brushes, sponges, and stamps to create realistic textures and patterns on the surface of the cultured stone. Experiment with different techniques to achieve a natural stone-like appearance.
3. Mix Custom Colors: Blend concrete coloring pigments to create custom hues that complement your design scheme. Consider adding multiple layers of color to achieve a multi-dimensional look on the cultured stone.
4. Allow for Creative Imperfections: Embrace the natural variations and imperfections of real stone by incorporating subtle flaws and irregularities into your cultured stone designs. This will add authenticity and character to your finished projects.
5. Test Different Sealers: Experiment with different types of concrete sealers to find the best option for protecting and enhancing the appearance of your cultured stone. Matte, satin, and gloss finishes can each create unique effects on the surface of the stone.
Creative Ideas for Using Cultured Stone
Once you have mastered the art of creating custom cultured stone, the possibilities for using it in home improvement projects are endless. Here are some creative ideas to inspire you to incorporate cultured stone into your designs:
1. Accent Walls: Create a stunning focal point in your living room, bedroom, or entryway by covering an accent wall with custom cultured stone. Choose a color and texture that complements your existing decor for a cohesive look.
2. Fireplace Surrounds: Enhance the look of your fireplace with a custom cultured stone surround that adds warmth and sophistication to the room. Mix and match stone shapes and sizes to create a unique and inviting feature.
3. Outdoor Kitchen: Build an outdoor kitchen with a durable and stylish cultured stone countertop and backsplash. The natural look of the stone will blend seamlessly with the outdoor environment while providing a practical and beautiful surface for cooking and entertaining.
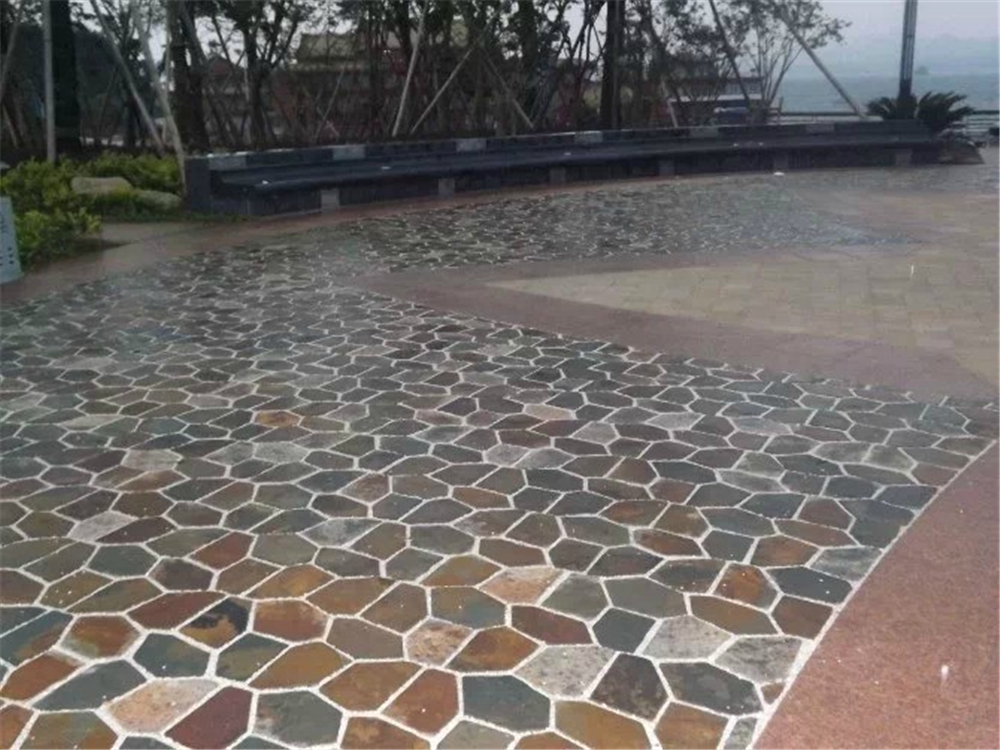
4. Garden Pathways: Line garden pathways and walkways with custom cultured stone pavers for a rustic and charming touch. Create a meandering path that winds through your garden, adding visual interest and texture to the landscape.
5. Water Features: Incorporate custom cultured stone into water features such as fountains, ponds, and water walls to create a serene and tranquil outdoor oasis. The natural look of the stone will enhance the beauty and ambiance of your outdoor space.
Conclusion
DIY cultured stone offers a cost-effective and customizable alternative to natural stone for a wide range of construction and design projects. By following the step-by-step instructions outlined in this guide and implementing the tips and creative ideas provided, you can create your own custom cultured stone with professional-looking results.
Whether you are looking to enhance the interior of your home with an accent wall or fireplace surround, or to elevate your outdoor living space with garden pathways and water features, custom cultured stone provides endless possibilities for creativity and personalization. Start experimenting with different mold designs, textures, colors, and applications to bring your vision to life and transform your living spaces with the beauty of custom cultured stone.
Cultured stone, also known as manufactured stone or stone veneer, is a popular alternative to natural stone for various construction and design projects. It offers the look and feel of real stone at a more affordable price point and with added flexibility in terms of customization. While cultured stone is readily available for purchase, many homeowners and DIY enthusiasts are opting to create their own custom cultured stone to suit their specific needs and preferences.
In this comprehensive guide, we will explore the process of DIY cultured stone production, including the materials and tools needed, step-by-step instructions, tips for achieving professional results, and creative ideas for using custom cultured stone in home improvement projects.
Materials and Tools
Before diving into the process of creating your own cultured stone, it is important to gather all the necessary materials and tools. Here is a list of items you will need to get started:
Materials:
1. Portland cement
2. Sand
3. Water
4. Concrete coloring pigment
5. Mold release agent
6. Fiberglass mesh
7. Concrete sealer
Tools:
1. Mixing container
2. Trowel
3. Rubber gloves
4. Safety glasses
5. Dust mask
6. Paintbrush
7. Mold for shaping the stone
It is essential to choose high-quality materials to ensure the durability and aesthetic appeal of your custom cultured stone. Additionally, consider the color palette and texture you want to achieve, as these choices will influence the selection of concrete coloring pigments and mold designs.
Step-by-Step Instructions
Now that you have gathered all the necessary materials and tools, let's walk through the step-by-step process of creating your own custom cultured stone:
Step 1: Prepare the Mold
Choose a mold design that suits the style and size of the cultured stone you want to create. Apply a mold release agent to the interior of the mold to prevent the concrete mixture from sticking.
Step 2: Mix the Concrete
In a mixing container, combine Portland cement, sand, water, and concrete coloring pigment according to the manufacturer's instructions. Mix the ingredients thoroughly until you achieve a smooth and workable consistency.
Step 3: Add Fiberglass Mesh
Cut a piece of fiberglass mesh to fit the mold and place it at the bottom of the mold. This will help reinforce the cultured stone and prevent cracking.
Natural ledge stone for landscaping : Fill the Mold
Using a trowel, carefully fill the mold with the concrete mixture, making sure to press it into all the corners and edges. Smooth the surface with the trowel to create a uniform appearance.
Step 5: Shape the Stone
Use a paintbrush or other tool to add texture and definition to the surface of the cultured stone before the concrete sets. You can create natural-looking imperfections and details to mimic the appearance of real stone.
Step 6: Cure the Stone
Allow the cultured stone to cure in the mold for the recommended time specified by the concrete manufacturer. This typically ranges from 24 to 48 hours, depending on the specific product used.
Step 7: Demold the Stone
Carefully remove the cultured stone from the mold once it has fully cured. Gently tap the mold to release the stone, being careful not to damage the edges or details.
Step 8: Seal the Stone
Apply a concrete sealer to the surface of the cultured stone to protect it from moisture, stains, and UV damage. Follow the manufacturer's instructions for proper application and drying times.
Tips for Achieving Professional Results
Creating custom cultured stone requires attention to detail and a steady hand to achieve professional-looking results. Here are some tips to help you enhance the quality and appearance of your DIY cultured stone:
1. Experiment with Different Mold Designs: Explore various mold shapes and sizes to create a diverse collection of cultured stones for your projects. Mix and match different designs to add visual interest and depth to your installations.
2. Practice Texture Techniques: Use tools like brushes, sponges, and stamps to create realistic textures and patterns on the surface of the cultured stone. Experiment with different techniques to achieve a natural stone-like appearance.
3. Mix Custom Colors: Blend concrete coloring pigments to create custom hues that complement your design scheme. Consider adding multiple layers of color to achieve a multi-dimensional look on the cultured stone.
4. Allow for Creative Imperfections: Embrace the natural variations and imperfections of real stone by incorporating subtle flaws and irregularities into your cultured stone designs. This will add authenticity and character to your finished projects.
5. Test Different Sealers: Experiment with different types of concrete sealers to find the best option for protecting and enhancing the appearance of your cultured stone. Matte, satin, and gloss finishes can each create unique effects on the surface of the stone.
Creative Ideas for Using Cultured Stone
Once you have mastered the art of creating custom cultured stone, the possibilities for using it in home improvement projects are endless. Here are some creative ideas to inspire you to incorporate cultured stone into your designs:
1. Accent Walls: Create a stunning focal point in your living room, bedroom, or entryway by covering an accent wall with custom cultured stone. Choose a color and texture that complements your existing decor for a cohesive look.
2. Fireplace Surrounds: Enhance the look of your fireplace with a custom cultured stone surround that adds warmth and sophistication to the room. Mix and match stone shapes and sizes to create a unique and inviting feature.
3. Outdoor Kitchen: Build an outdoor kitchen with a durable and stylish cultured stone countertop and backsplash. The natural look of the stone will blend seamlessly with the outdoor environment while providing a practical and beautiful surface for cooking and entertaining.
4. Garden Pathways: Line garden pathways and walkways with custom cultured stone pavers for a rustic and charming touch. Create a meandering path that winds through your garden, adding visual interest and texture to the landscape.
5. Water Features: Incorporate custom cultured stone into water features such as fountains, ponds, and water walls to create a serene and tranquil outdoor oasis. The natural look of the stone will enhance the beauty and ambiance of your outdoor space.
Conclusion
DIY cultured stone offers a cost-effective and customizable alternative to natural stone for a wide range of construction and design projects. By following the step-by-step instructions outlined in this guide and implementing the tips and creative ideas provided, you can create your own custom cultured stone with professional-looking results.
Whether you are looking to enhance the interior of your home with an accent wall or fireplace surround, or to elevate your outdoor living space with garden pathways and water features, custom cultured stone provides endless possibilities for creativity and personalization. Start experimenting with different mold designs, textures, colors, and applications to bring your vision to life and transform your living spaces with the beauty of custom cultured stone.

Public Last updated: 2025-04-26 04:12:53 AM