Mastering the Art of Cultured Stone Installation A Comprehensive Guide
Introduction
Cultured stone, also known as manufactured stone or faux stone, is a popular choice for homeowners and builders looking to enhance the aesthetic appeal of their properties. Made from a mixture of cement, aggregates, and iron oxides, cultured stone offers the look and feel of natural stone at a fraction of the cost. In addition to being more affordable, cultured stone is also lighter and easier to install, making it a versatile option for both interior and exterior applications.
In this comprehensive guide, we will explore the process of cultured stone installation in detail. From preparing the surface to applying the stones and finishing touches, we will cover every step of the installation process to help you achieve professional results.
Understanding Cultured Stone
Before diving into the installation process, it is important to have a clear understanding of what cultured stone is and how it differs from natural stone. Cultured stone is a man-made product designed to mimic the appearance of natural stone. It is created by pouring a mixture of cement, aggregates, and iron oxides into molds that are cast from real stone to capture the authentic texture and shape.
One of the key advantages of cultured stone is its affordability. Natural stone can be expensive and heavy, making it a less practical option for many homeowners. Cultured stone offers a cost-effective alternative that is lightweight and easy to work with. Additionally, cultured stone comes in a wide range of colors, shapes, and styles, allowing for greater design flexibility.
Preparing for Installation
Proper preparation is crucial to the success of any cultured stone installation project. Before you begin, make sure you have the necessary tools and materials on hand, including:
- Cultured stone veneers
- Mortar mix
- Metal lath
- Scratch coat
- Flashing and weep screed
- Masonry tools (trowel, mortar hawk, etc.)
- Safety gear (gloves, goggles, etc.)
Once you have gathered your supplies, the next step is to prepare the surface for installation. This involves ensuring that the substrate is clean, flat, and structurally sound. If you are working on an exterior wall, it is important to install a weather-resistant barrier to protect against moisture infiltration. For interior applications, a moisture barrier may also be necessary to prevent water damage.
Installing Cultured Stone
With the surface prepared, you are ready to begin the installation process. Follow these steps to achieve professional results:
1. Apply Metal Lath: Metal lath is a mesh-like material that provides a stable base for the cultured stone veneers to adhere to. Secure the metal lath to the substrate using galvanized nails or staples, making sure to overlap the edges by at least 2 inches.
2. Mix Mortar: Prepare a batch of mortar according to the manufacturer's instructions. The consistency should be similar to peanut butter to ensure good adhesion. Apply a scratch coat of mortar to the metal lath using a trowel, making sure to create a rough texture to help the stones adhere.
3. Layout Stones: Before applying the stones, lay them out in the desired pattern to ensure a cohesive look. Start from the bottom and work your way up, staggering the joints for a more natural appearance.
4. Apply Stones: Using a trowel, apply a layer of mortar to the back of each stone and press it firmly into place on the scratch coat. Make sure to leave a small gap between the stones for mortar joints. Continue this process, working in small sections at a time.
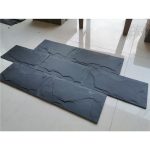
5. Fill Joints: Once the stones are in place, fill the mortar joints using a grout bag or trowel. Smooth out the joints to create a clean, uniform finish. Allow the mortar to set for the recommended time before proceeding.
6. Clean Up: Once the mortar has set, use a stiff brush to remove any excess mortar from the surface of the stones. Rinse the stones with clean water to remove any remaining residue and allow them to dry completely.
Finishing Touches
To complete the cultured stone installation, consider adding finishing touches to enhance the overall look of the project. Stone veneer for kitchen backsplashes may include:
- Sealing: To protect the stones from stains and moisture, consider applying a sealant to the surface. Be sure to choose a product that is suitable for cultured stone and follow the manufacturer's instructions for application.
- Touch-Up: Inspect the installation for any gaps or imperfections and touch up as needed with additional mortar or grout. Pay attention to detail to ensure a seamless finish.
- Maintenance: Cultured stone is relatively low maintenance, but it is important to clean the surface regularly to prevent dirt and debris from accumulating. Use a mild detergent and water to clean the stones, avoiding harsh chemicals that could damage the finish.
Conclusion
Cultured stone installation is a rewarding project that can transform the look of your home or building. By following the steps outlined in this guide and paying attention to detail, you can achieve professional results that will enhance the aesthetic appeal and value of your property. Whether you are a seasoned builder or a DIY enthusiast, cultured stone offers a versatile and cost-effective option for creating stunning stone features that will stand the test of time.
Cultured stone, also known as manufactured stone or faux stone, is a popular choice for homeowners and builders looking to enhance the aesthetic appeal of their properties. Made from a mixture of cement, aggregates, and iron oxides, cultured stone offers the look and feel of natural stone at a fraction of the cost. In addition to being more affordable, cultured stone is also lighter and easier to install, making it a versatile option for both interior and exterior applications.
In this comprehensive guide, we will explore the process of cultured stone installation in detail. From preparing the surface to applying the stones and finishing touches, we will cover every step of the installation process to help you achieve professional results.
Understanding Cultured Stone
Before diving into the installation process, it is important to have a clear understanding of what cultured stone is and how it differs from natural stone. Cultured stone is a man-made product designed to mimic the appearance of natural stone. It is created by pouring a mixture of cement, aggregates, and iron oxides into molds that are cast from real stone to capture the authentic texture and shape.
One of the key advantages of cultured stone is its affordability. Natural stone can be expensive and heavy, making it a less practical option for many homeowners. Cultured stone offers a cost-effective alternative that is lightweight and easy to work with. Additionally, cultured stone comes in a wide range of colors, shapes, and styles, allowing for greater design flexibility.
Preparing for Installation
Proper preparation is crucial to the success of any cultured stone installation project. Before you begin, make sure you have the necessary tools and materials on hand, including:
- Cultured stone veneers
- Mortar mix
- Metal lath
- Scratch coat
- Flashing and weep screed
- Masonry tools (trowel, mortar hawk, etc.)
- Safety gear (gloves, goggles, etc.)
Once you have gathered your supplies, the next step is to prepare the surface for installation. This involves ensuring that the substrate is clean, flat, and structurally sound. If you are working on an exterior wall, it is important to install a weather-resistant barrier to protect against moisture infiltration. For interior applications, a moisture barrier may also be necessary to prevent water damage.
Installing Cultured Stone
With the surface prepared, you are ready to begin the installation process. Follow these steps to achieve professional results:
1. Apply Metal Lath: Metal lath is a mesh-like material that provides a stable base for the cultured stone veneers to adhere to. Secure the metal lath to the substrate using galvanized nails or staples, making sure to overlap the edges by at least 2 inches.
2. Mix Mortar: Prepare a batch of mortar according to the manufacturer's instructions. The consistency should be similar to peanut butter to ensure good adhesion. Apply a scratch coat of mortar to the metal lath using a trowel, making sure to create a rough texture to help the stones adhere.
3. Layout Stones: Before applying the stones, lay them out in the desired pattern to ensure a cohesive look. Start from the bottom and work your way up, staggering the joints for a more natural appearance.
4. Apply Stones: Using a trowel, apply a layer of mortar to the back of each stone and press it firmly into place on the scratch coat. Make sure to leave a small gap between the stones for mortar joints. Continue this process, working in small sections at a time.
5. Fill Joints: Once the stones are in place, fill the mortar joints using a grout bag or trowel. Smooth out the joints to create a clean, uniform finish. Allow the mortar to set for the recommended time before proceeding.
6. Clean Up: Once the mortar has set, use a stiff brush to remove any excess mortar from the surface of the stones. Rinse the stones with clean water to remove any remaining residue and allow them to dry completely.
Finishing Touches
To complete the cultured stone installation, consider adding finishing touches to enhance the overall look of the project. Stone veneer for kitchen backsplashes may include:
- Sealing: To protect the stones from stains and moisture, consider applying a sealant to the surface. Be sure to choose a product that is suitable for cultured stone and follow the manufacturer's instructions for application.
- Touch-Up: Inspect the installation for any gaps or imperfections and touch up as needed with additional mortar or grout. Pay attention to detail to ensure a seamless finish.
- Maintenance: Cultured stone is relatively low maintenance, but it is important to clean the surface regularly to prevent dirt and debris from accumulating. Use a mild detergent and water to clean the stones, avoiding harsh chemicals that could damage the finish.
Conclusion
Cultured stone installation is a rewarding project that can transform the look of your home or building. By following the steps outlined in this guide and paying attention to detail, you can achieve professional results that will enhance the aesthetic appeal and value of your property. Whether you are a seasoned builder or a DIY enthusiast, cultured stone offers a versatile and cost-effective option for creating stunning stone features that will stand the test of time.
Public Last updated: 2025-06-10 03:29:30 AM