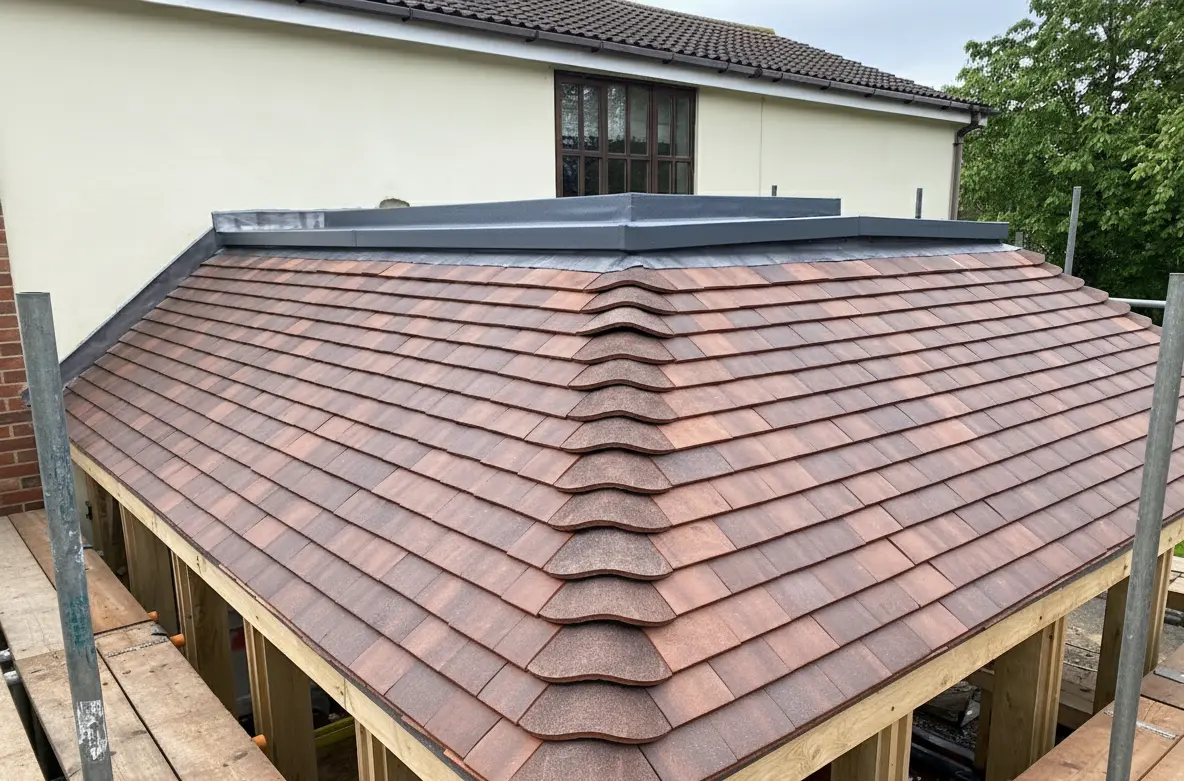
Flat Roof Repair Kings Lynn: Seam and Joint Solutions
Flat roofs live or die at the seams. Joints, laps, corners, and penetrations are where almost every leak begins, whether it’s on an old built‑up felt system from the 1980s or a neat modern EPDM laid last spring. In Kings Lynn, we repair more moisture damage at roof edges and upstands than anywhere else, and that pattern holds across domestic extensions, shops along London Road, and light industrial units on the outskirts. The material choices change, but the physics does not: water finds the weak point, wind stresses the edges, and thermal movement opens the gap.
This guide focuses on seam and joint solutions that hold up in our local conditions. It draws on what we see week after week, with failures you can spot from a ladder and repairs you can trust through another winter off the Wash. If you are searching for Flat roofing Kings Lynn or comparing King’s Lynn Roofers for King's Lynn Roofers a repair job, the details below will help you ask the right questions and make sense of the quotes.
Why seams and joints fail first
A flat roof is never perfectly flat. It moves, even if you can’t see it. Warm days push materials to expand, cold nights pull them tight, rain loads the deck, wind lifts at the perimeter. Every material responds differently. Felt and bitumen creep, PVC shrinks, EPDM relaxes, GRP becomes rigid, metal flexes along its fasteners. The seams and joints are the only places where two planes meet or one material bonds to another, so they absorb compounded stress.
Add water and time. Standing water pressures sealant. Frost wedges in micro gaps. UV cooks exposed adhesive. Moss holds moisture at laps. On paper, a 25‑year membrane should ignore all of this. On a roof, a slightly under‑primed upstand or a thin trowel of bitumen around a pipe can undo a whole system.
In Kings Lynn, the wind direction and salt‑laden air off the coast matter. You won’t see salt crystals up on the roof, but the atmosphere accelerates plasticiser loss in older PVC and chalking in fiberglass. That shows first along welds and joints.
Identifying the leak path before you repair
Seam repairs fail when you treat the symptom, not the route. Water might appear on a ceiling far from the entry point. We start with the basics. Trace the slope. Look at the highest plausible penetration in line with the stain. Check the perimeter trims and drip edges. Then scan the membrane for stress marks at joints. A split at an internal corner or a lifted lap might be the true cause, even if it doesn’t look dramatic.
Inside, inspect the deck from the loft or underside if you can. Moisture tracks along joists and deck joints. In timber, stains run with the grain. In concrete, damp spreads more slowly but stays longer. If the insulation is wet, you can feel the weight underfoot or see blistering. We mark suspect seams with chalk, then water test in controlled sections. You don’t need a hose over the whole roof. A few minutes directed at a seam tells you more than an hour of guesswork.
Material types in Kings Lynn and what their seams demand
Different membranes require different seam treatments. If a contractor proposes the same fix for everything, keep looking.
Built‑up felt and bitumen systems
Plenty of houses and bungalows around Kings Lynn still have torch‑on bitumen felt with mineral capsheets. The seams are overlapped and bonded with heat. Failures tend to show as little fish mouths at laps, splits along the mineral‑to‑mineral bond, or cracks at the upstand where the felt transitions from deck to wall.
Repairs: Clean back to sound bitumen, not just the surface mineral. Prime with bitumen primer if the substrate is aged or dusty. For small fish mouths, cut a V notch, heat, and dress it down, then add a 150 to 200 mm cap patch with correct bleed on all sides. For larger splits, we often install a 2‑layer repair with a torch‑on underlay patch then a capsheet patch above, staggering the seams. A cold‑applied liquid bitumen can help where open flame is unsafe near timber cladding or plastic fascias.
Common mistake: Skimming cold mastic over a dirty mineral surface. It looks tidy for a month and then lifts at the first frost.
EPDM rubber
EPDM is common on recent extensions and replacement roofs. It has strong longevity, but the seams depend on clean surfaces and the right tapes and primers. We see failures where DIY installers used general adhesive instead of seam tape, or when tape was applied in cold, damp conditions. Shrinkage around internal corners and pipe boots can also open micro gaps.
Repairs: Use EPDM‑compatible seam tape and primer. Clean with manufacturer‑approved sponges and solvents, not white spirit. Round the corners of patches to avoid stress points. For a pinhole along a seam, a 75 mm cover strip with primer often suffices. For corners and penetrations, use preformed corners or flashing tape as a boot, then terminate with a proper bar and sealant if against masonry. Avoid mixing systems; the wrong adhesive can soften or powder EPDM over time.
Common mistake: Pressing tape by hand without a roller. You need firm, even pressure to set the bond, and a silicone hand roller is cheap insurance.
PVC and TPO single‑ply
There are fewer of these on domestic roofs locally, but they’re common on small commercial units and schools. Seams are hot‑air welded. Failures often start where factory welds meet site welds, at detail work around outlets, and along aged laps where plasticisers have migrated.
Repairs: Clean the weld area thoroughly. Test the weldability of the membrane. Older PVC can be chalky and reluctant to fuse. A short test strip tells you whether a heat weld will hold or if you need a compatible liquid detail compound. Adjust heat and speed: too cool, the bead is weak; too hot, you scar and thin the membrane. Use patches with rounded corners, at least 60 to 80 mm beyond the defect in all directions.
Common mistake: Trying to heat‑weld on a damp morning. Trapped moisture flashes into steam and undermines the weld.
GRP (fiberglass)
GRP is rigid, which helps against foot traffic but can crack at movement joints and upstands if not detailed with expansion breaks. Most leaks on fiberglass roofs trace back to hairline cracks where trims meet the field or pinholes along the laminate at corners.
Repairs: Sand back to clean laminate, not just the topcoat. Feather the edges. Degrease, then apply compatible resin and mat in layers, finishing with topcoat that matches the system. At repeatedly moving joints, consider adding a flexible joint band where possible. In practice, many GRP roofs benefit from a liquid waterproofing overlay at detail areas if movement is significant.
Common mistake: Painting over a crack with topcoat alone. Topcoat is not structural and will not bridge a working joint.
Metal roofs and cappings
On small flat roofs, metal appears as cappings or trims rather than full systems. Seams fail at pop rivets, sealant joints, and interfaces with membrane upstands.
Repairs: Replace failed fixings with stainless where possible. Clean and re‑seal with a high‑grade, UV‑stable sealant, or install cover flashings that shed water away from the joint. On wider cappings, add a bond‑breaker tape before applying a liquid waterproofing band to accommodate movement.
Common mistake: Over‑tightening fasteners, which dimples the metal and creates water pockets at seams.
Priority areas: where leaks start and how to treat them
Water finds transitions and penetrations first. If you have limited budget or time, focus here and you’ll prevent nine out of ten leaks.
Perimeter edges: If the drip edge or kerb detail is poorly formed, water wicks under the membrane. For felt, ensure the capsheet turns over and is mechanically pinned or bonded, then counter‑flashed. For EPDM, use a proper edge termination bar with sealed fixings. Always run the membrane far enough over the edge to stop capillary action.
Upstands and parapets: The minimum height should be 150 mm above finished roof level, including any planned standing water. Many older extensions have upstands closer to 80 to 100 mm, especially under low sills. At low heights, wind‑driven rain finds joints easily. Where you can’t raise the upstand, a liquid‑applied flashing can buy margin, but the durable fix is to redesign the detail or improve the falls to remove ponding near the wall.
Outlets and gutters: Internal outlets cause disproportionate trouble. Leaves and grit block strainers, water sits, and tiny joints become big problems. Fit domed strainers, check falls, and re‑form the outlet surround with a single‑piece boot or a liquid collar that ties at least 200 mm into the field membrane.
Skylights and rooflights: Factory flanges are only as good as their ties to the membrane. We reinstall many with preformed corner pieces and continuous flashing strips, then counter‑seal under the frame where the manufacturer allows. If the rooflight is old and brittle, consider replacement during the repair. It’s often the better spend.
Services penetrations: Boiler flues, vent pipes, and cables deserve a proper boot or collar. A blob of mastic where a cable enters the roof will fail. For EPDM, use a proprietary pipe boot with clamping ring. For felt, build a lead or GRP collar that ties into the membrane with staggered laps.
Repair methods that last
Quick fixes have their place in a storm, but proper seam and joint repairs follow a sequence. Surface prep is half the job. The other half is detail work that allows the joint to move without tearing.
Seam patching on bitumen: Cut away loose mineral, dry the area, and warm the substrate until it sweats slightly. Install a low‑melt underlay patch if the deck is uneven, then a capsheet patch that extends at least 100 mm beyond the defect. Dress edges to show a bitumen bleed all around. Avoid trapping moisture by keeping the torch moving and lifting the patch slightly to vent as you heat.
Tape and roller on EPDM: Prime both faces as specified, wait until tacky but not wet, and align the tape without stretching the membrane. Roll with firm, overlapping passes. For corners, cut reliefs that avoid creases, then overlay with a flashing patch with rounded corners. Seal terminations with compatible lap sealant, not general silicone.
These two methods cover most domestic roofs in Kings Lynn. Commercial jobs add hot‑air welding and liquid detailing, but the principle is the same: clean, dry, compatible materials, and attention to how the joint moves.
Liquid waterproofing for complex joints
Complex details sometimes resist patching. If you have multiple small cracks around a rooflight curb or a cluster of penetrations, a local liquid waterproofing band can be appropriate. Polyurethane and PMMA systems excel here because they bond to a range of substrates and remain flexible. The workflow is straightforward: abrade, clean, prime where required, bed reinforcement fleece in liquid, and top it while still wet. You end up with a monolithic, elastic joint cover that rides over corners and screws without seams.

We often use liquid on older GRP details that keep cracking at the same place. A 200 to 300 mm wide liquid band, properly reinforced, turns that troublesome joint into a single elastic zone. In late autumn, choose a product that cures at lower temperatures. Most will work down to 5°C, some to 0°C, but you need a dry window of a few hours.
Weather windows and timing in West Norfolk
We repair roofs all year, but the best seam work happens in stable, dry weather. Morning dew matters. In late autumn around Kings Lynn, a roof can stay damp until 10 or 11 am, especially in shaded spots. Pushing ahead on a damp surface is the easiest way to sabotage a seam. We sequence jobs around sun and shade, starting on the dry side, then crossing the roof as the day warms. In winter, keep materials warm. EPDM primers and seam tapes behave better out of a warm van than from a frosty boot.
Wind is another factor. Torch‑on patches in gusts are a poor idea. So are light PVC welds that cool too fast. If the forecast shows 30 mph gusts, reschedule exposed detail work. It’s not about comfort, it’s about adhesion and safety.
Drainage and the role of ponding
Flat roofs can tolerate shallow ponding for short periods, but persistent standing water accelerates joint failure. It amplifies UV stress through reflected light, keeps adhesives wet, and lays silt over laps. We look for shallow sags near joints. Even a 5 to 10 mm depression can hold a puddle after showers.
You don’t always need a full reroof to correct this. Localised tapered insulation, added under an overlay patch, can nudge water back to an outlet. On felt, a two‑course build‑up with a tapered underlay cut to falls, then a capsheet, can eliminate a pond at a notorious joint. We do this more often than people expect, and it saves money by keeping the rest of the roof in service.
Cost ranges and when to overlay
Nobody likes surprises on the bill, so here is a grounded view of repair costs in our area. Small seam repairs on felt or EPDM, say two or three patches around 200 to 300 mm each, often land in the low hundreds when access is straightforward. More involved joint refurbishment around a rooflight with liquid detailing can run mid hundreds. If half the seams on a small extension have issues or the insulation is wet, you’re entering overlay territory. A quality overlay of a modest 15 to 25 square meter roof with single‑ply or a two‑layer felt system can sit in the low thousands, varying with access, insulation, and edge detail upgrades.
Overlay makes sense when the deck is sound and dry, the existing membrane is flat and well‑bonded, and the parapet heights allow for added thickness. If the deck is spongy, saturated, or the roof already struggles with upstand height, a strip and replace is safer. A good contractor will lift test squares, check moisture, and tell you plainly which side of that line you’re on.
Working with King’s Lynn Roofers: what to ask and expect
Choosing a contractor is less about the logo and more about the detail they can show. When you gather quotes for Flat roof repair Kings Lynn, look for two things: diagnosis and method.
Diagnosis: Ask them to point out the exact failure points and explain why those joints opened. If they can’t show you fish mouths, underbaked welds, or poor terminations, they’re guessing. A roofer who brings chalk and marks the suspect seams is usually the one who will fix the right thing.
Method: For EPDM, listen for primers, seam tapes, rollers, preformed corners. For felt, ask about primer, bleed, and patch sizing. For liquids, ask about reinforcement fleece and cure temperatures. If a quote says “seal with mastic” as the primary fix, be cautious unless it’s clearly labeled as an emergency stopgap with follow‑up planned.
Warranties on repairs tend to be short, typically 12 months for local seam work, longer if a liquid manufacturer signs off. That’s reasonable because you are addressing part of a system, not installing a new one. A longer warranty often comes with a more comprehensive scope: replacing trims, rebuilding outlet details, or overlaying whole sections.
Maintenance that prevents joint failure
A little care extends the life of seam repairs by years. You don’t need to hover over the roof, but seasonal checks matter. After the first heavy rain of autumn, confirm outlets are clear and water is running off. In spring, look at the sun‑exposed edges for early signs of lift or cracking. If you don’t like heights, ask for an annual maintenance visit along with gutter clearing. Photos from your contractor make a big difference in spotting trends.
Keep foot traffic off unless necessary. If you do need access for TV aerials or window cleaning, lay a temporary walkway and avoid stepping near seams. Sharp gravel under shoes will nick an EPDM seam more easily than you think.
When a local overlay beats repeated patching
There is a moment when repairing the same roof becomes false economy. We see it after three or four callouts in two years, often on older felt roofs where the mineral capsheet is hard and crazed. Seams keep opening because the field membrane has lost flexibility. If the deck is dry and the insulation still good, overlaying with a single‑ply or a new felt layer, adding fresh upstands and outlet details, costs more than a patch but less than a strip and gives you a new system over the old bones. In Kings Lynn, overlays work well on many 1990s extensions, especially when combined with insulated fascia upgrades and correct terminations into brickwork.
A brief case from the field
A customer near Gaywood had an EPDM extension with a persistent leak around a cluster of pipes. Three previous visits from different companies had left beads of generic silicone and a patch that lifted at one corner. We pulled back the patch and found unprimed EPDM under a flashing tape, plus a small depression holding water. The fix took half a day: cleaned and primed a wider area, fitted a proper EPDM pipe boot for the largest penetration, flashed the smaller conduits with compatible tape, installed a liquid band with reinforcement over the whole cluster to tie them together, then introduced a small tapered infill to push water toward the outlet. That roof saw two winters without a callback, and the inside stain finally dried.
Climate quirks and materials choice
Our local weather swings from cold, damp winters to UV‑bright summer days with high winds. Materials respond differently. EPDM handles UV and temperature well but depends on meticulous seam prep. Felt tolerates occasional ponding but dislikes long‑term heat buildup near dark parapets without ventilation. PVC welds well but ages faster in salty air unless specified with higher‑grade formulations. GRP is resilient but needs movement allowances at long runs and upstands.
When you plan a repair that touches more than one joint, consider the compatibility of the new materials. Don’t put solvent‑heavy mastics against EPDM. Don’t rely on generic silicone near bitumen. A good roofer will carry multiple primers and sealants and pick the right one for the roof in front of them.
Safety, access, and the small things that change outcomes
Roof work looks simple from the ground. On the roof, little factors decide whether a seam holds: a clean cloth versus a dusty rag, a roller used patiently, a primer allowed to flash off, a torch used with control instead of hurry. Access matters too. A safe platform means time to work the detail properly. If scaffolding seems excessive for a small patch, remember that good access gives better prep and cleaner finishes, especially at parapets and rooflight kerbs.
We allow time to dry trapped moisture. If a seam was leaking for weeks, insulation near that joint takes on water. You won’t dry a saturated board in an afternoon, but a surface that feels dry can still breathe out moisture under a new patch and cause blisters. Where we suspect this, we either vent before patching, replace the wet section, or use a repair method that tolerates some vapor, like a vented underlay below a capsheet patch.
What to expect during a seam repair visit
A typical residential seam and joint repair visit in Kings Lynn runs like this. We walk the roof, mark defects, photograph them, and discuss the scope. We prepare the surfaces thoroughly: sweep, vacuum, abrade, and dry. We carry out the repairs in sequence, working from the highest risk areas to the edges, then test with light water where appropriate. We seal small fasteners and terminations as we go. Finally, we review the photos with the homeowner and point out anything to monitor. If we see an area that will need attention within a year, we say so. Clear expectations stop small issues becoming big ones.
The role of local expertise
Flat roofing is both a trade and a local craft. Knowledge of Kings Lynn’s housing stock, typical extensions, and the way our weather works across the year makes repairs more predictable. A roofer who has stood on the same kinds of roofs dozens of times will understand why that particular parapet cracks or why the south‑west corner lifts first. When you search for Flat roof repair Kings Lynn, look for that familiarity as much as brand badges. The best King’s Lynn Roofers will happily explain the why behind their method, not just the what.
Seams and joints decide the life of a flat roof. Treat them with respect, choose materials that suit the substrate, and work within the weather. Do that, and you can turn a leaking joint into a quiet, forgettable part of your home for years.

Public Last updated: 2025-09-09 12:03:51 PM