Enhancing Your Kitchen with a Cultured Stone Backsplash
Introduction
When it comes to kitchen design, the backsplash plays a crucial role in both functionality and aesthetics. A well-chosen backsplash can elevate the overall look of your kitchen while also protecting the walls from splashes and stains. One popular choice for homeowners looking to add a touch of elegance and sophistication to their kitchen is a cultured stone backsplash. In this comprehensive guide, we will explore the benefits, design options, installation process, and maintenance tips for a cultured stone backsplash.
What is Cultured Stone?
Cultured stone, also known as manufactured stone or faux stone, is a man-made material that replicates the look and feel of natural stone. Made from a mixture of cement, aggregates, and pigments, cultured stone is molded and colored to closely resemble various types of natural stone, such as granite, marble, limestone, and travertine. The result is a versatile and cost-effective alternative to natural stone that offers a high level of customization and durability.
Benefits of Cultured Stone Backsplash
1. Aesthetic Appeal: Cultured stone backsplashes can add a touch of luxury and sophistication to any kitchen. With a wide range of colors, textures, and patterns to choose from, you can easily find a cultured stone option that complements your kitchen's décor and personal style.
2. Durability: Cultured stone is a highly durable material that is resistant to heat, moisture, and stains. This makes it an ideal choice for a backsplash, where it will be exposed to splashes, spills, and cooking heat on a daily basis.
3. Cost-Effective: Compared to natural stone, cultured stone is more affordable, making it a budget-friendly option for homeowners looking to achieve the look of stone without breaking the bank.
4. Easy Maintenance: Cultured stone backsplashes are easy to clean and maintain. Simply wipe down the surface with a mild detergent and water to keep it looking like new.
5. Versatility: Cultured stone can be molded into various shapes and sizes, allowing for endless design possibilities. Whether you prefer a sleek and modern look or a rustic and textured finish, cultured stone can be customized to suit your preferences.
Design Options for Cultured Stone Backsplash
1. Tile Style: Cultured stone backsplashes are available in tile form, making it easy to create intricate patterns and designs on your kitchen walls. Choose from square, rectangular, or mosaic tiles to achieve the look you desire.
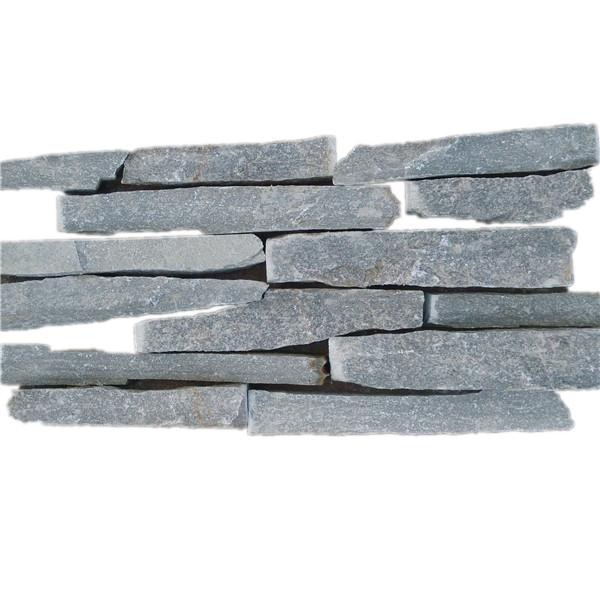
2. Stacked Stone: For a more rustic and natural look, consider a stacked stone backsplash. This style features irregularly shaped stones stacked on top of each other to create a textured and visually appealing surface.
3. Brick Pattern: Create a timeless and classic look with a brick pattern cultured stone backsplash. This style mimics the look of traditional brick walls, adding warmth and charm to your kitchen space.
4. Custom Designs: If you have a specific design in mind, many manufacturers offer custom options for cultured stone backsplashes. Whether you want a particular color, shape, or texture, you can work with a designer to create a unique backsplash that reflects your personal style.
Installation Process
1. Preparation: Before installing a cultured stone backsplash, make sure the wall is clean, dry, and free of any debris. If you are replacing an existing backsplash, remove the old tiles and patch any holes or cracks in the wall.
2. Layout: Plan out the layout of your backsplash, taking into account any outlets, switches, or other obstacles on the wall. Use a level and chalk lines to create a guide for your installation.
3. Adhesive Application: Apply a thin layer of adhesive to the wall using a trowel. Make sure to follow the manufacturer's instructions for the specific type of adhesive you are using.
4. Tile Installation: Place the cultured stone tiles onto the adhesive, starting from the bottom and working your way up. Press each tile firmly into place to ensure a strong bond.
5. Grouting: Once the tiles are in place, allow the adhesive to dry completely before grouting. Apply grout between the tiles using a grout float, making sure to fill in all the gaps and joints.
6. Cleaning: Wipe off any excess grout with a damp sponge, being careful not to disturb the tiles. Allow the grout to dry according to the manufacturer's instructions before sealing the backsplash.
Maintenance Tips
1. Regular Cleaning: To keep your cultured stone backsplash looking its best, clean it regularly with a mild detergent and water. Avoid using harsh chemicals or abrasive cleaners that could damage the surface.
2. Sealing: Depending on Stone veneer for creative expression of cultured stone you choose, you may need to seal the backsplash to protect it from stains and moisture. Follow the manufacturer's recommendations for sealing and reseal the backsplash as needed.
3. Avoid Heat: While cultured stone is heat-resistant, it is still important to avoid placing hot pots and pans directly on the backsplash to prevent any potential damage.
4. Repair Chips and Cracks: If you notice any chips or cracks in the cultured stone, repair them promptly to prevent further damage. Use a stone repair kit or contact a professional for assistance.
Conclusion
A cultured stone backsplash is a versatile and stylish option for enhancing the look of your kitchen. With its aesthetic appeal, durability, and customization options, cultured stone can transform your kitchen space into a beautiful and functional area for cooking and entertaining. Whether you prefer a modern tile design, a rustic stacked stone look, or a custom pattern, there is a cultured stone backsplash option to suit your style and budget. By following the installation process and maintenance tips outlined in this guide, you can enjoy a stunning and long-lasting backsplash that adds value to your home for years to come.
When it comes to kitchen design, the backsplash plays a crucial role in both functionality and aesthetics. A well-chosen backsplash can elevate the overall look of your kitchen while also protecting the walls from splashes and stains. One popular choice for homeowners looking to add a touch of elegance and sophistication to their kitchen is a cultured stone backsplash. In this comprehensive guide, we will explore the benefits, design options, installation process, and maintenance tips for a cultured stone backsplash.
What is Cultured Stone?
Cultured stone, also known as manufactured stone or faux stone, is a man-made material that replicates the look and feel of natural stone. Made from a mixture of cement, aggregates, and pigments, cultured stone is molded and colored to closely resemble various types of natural stone, such as granite, marble, limestone, and travertine. The result is a versatile and cost-effective alternative to natural stone that offers a high level of customization and durability.
Benefits of Cultured Stone Backsplash
1. Aesthetic Appeal: Cultured stone backsplashes can add a touch of luxury and sophistication to any kitchen. With a wide range of colors, textures, and patterns to choose from, you can easily find a cultured stone option that complements your kitchen's décor and personal style.
2. Durability: Cultured stone is a highly durable material that is resistant to heat, moisture, and stains. This makes it an ideal choice for a backsplash, where it will be exposed to splashes, spills, and cooking heat on a daily basis.
3. Cost-Effective: Compared to natural stone, cultured stone is more affordable, making it a budget-friendly option for homeowners looking to achieve the look of stone without breaking the bank.
4. Easy Maintenance: Cultured stone backsplashes are easy to clean and maintain. Simply wipe down the surface with a mild detergent and water to keep it looking like new.
5. Versatility: Cultured stone can be molded into various shapes and sizes, allowing for endless design possibilities. Whether you prefer a sleek and modern look or a rustic and textured finish, cultured stone can be customized to suit your preferences.
Design Options for Cultured Stone Backsplash
1. Tile Style: Cultured stone backsplashes are available in tile form, making it easy to create intricate patterns and designs on your kitchen walls. Choose from square, rectangular, or mosaic tiles to achieve the look you desire.
2. Stacked Stone: For a more rustic and natural look, consider a stacked stone backsplash. This style features irregularly shaped stones stacked on top of each other to create a textured and visually appealing surface.
3. Brick Pattern: Create a timeless and classic look with a brick pattern cultured stone backsplash. This style mimics the look of traditional brick walls, adding warmth and charm to your kitchen space.
4. Custom Designs: If you have a specific design in mind, many manufacturers offer custom options for cultured stone backsplashes. Whether you want a particular color, shape, or texture, you can work with a designer to create a unique backsplash that reflects your personal style.
Installation Process
1. Preparation: Before installing a cultured stone backsplash, make sure the wall is clean, dry, and free of any debris. If you are replacing an existing backsplash, remove the old tiles and patch any holes or cracks in the wall.
2. Layout: Plan out the layout of your backsplash, taking into account any outlets, switches, or other obstacles on the wall. Use a level and chalk lines to create a guide for your installation.
3. Adhesive Application: Apply a thin layer of adhesive to the wall using a trowel. Make sure to follow the manufacturer's instructions for the specific type of adhesive you are using.
4. Tile Installation: Place the cultured stone tiles onto the adhesive, starting from the bottom and working your way up. Press each tile firmly into place to ensure a strong bond.
5. Grouting: Once the tiles are in place, allow the adhesive to dry completely before grouting. Apply grout between the tiles using a grout float, making sure to fill in all the gaps and joints.
6. Cleaning: Wipe off any excess grout with a damp sponge, being careful not to disturb the tiles. Allow the grout to dry according to the manufacturer's instructions before sealing the backsplash.
Maintenance Tips
1. Regular Cleaning: To keep your cultured stone backsplash looking its best, clean it regularly with a mild detergent and water. Avoid using harsh chemicals or abrasive cleaners that could damage the surface.
2. Sealing: Depending on Stone veneer for creative expression of cultured stone you choose, you may need to seal the backsplash to protect it from stains and moisture. Follow the manufacturer's recommendations for sealing and reseal the backsplash as needed.
3. Avoid Heat: While cultured stone is heat-resistant, it is still important to avoid placing hot pots and pans directly on the backsplash to prevent any potential damage.
4. Repair Chips and Cracks: If you notice any chips or cracks in the cultured stone, repair them promptly to prevent further damage. Use a stone repair kit or contact a professional for assistance.
Conclusion
A cultured stone backsplash is a versatile and stylish option for enhancing the look of your kitchen. With its aesthetic appeal, durability, and customization options, cultured stone can transform your kitchen space into a beautiful and functional area for cooking and entertaining. Whether you prefer a modern tile design, a rustic stacked stone look, or a custom pattern, there is a cultured stone backsplash option to suit your style and budget. By following the installation process and maintenance tips outlined in this guide, you can enjoy a stunning and long-lasting backsplash that adds value to your home for years to come.

Public Last updated: 2025-07-10 06:01:43 AM